The user’s Inbox is where incoming faxes are stored. The total number of faxes is displayed in red in the bottom right corner of the Inbox. The  icon indicates that the fax is not read yet. Click the blue link to sort by any of the headings in the Inbox.
Click the blue “From” link to open the Fax More Details window.
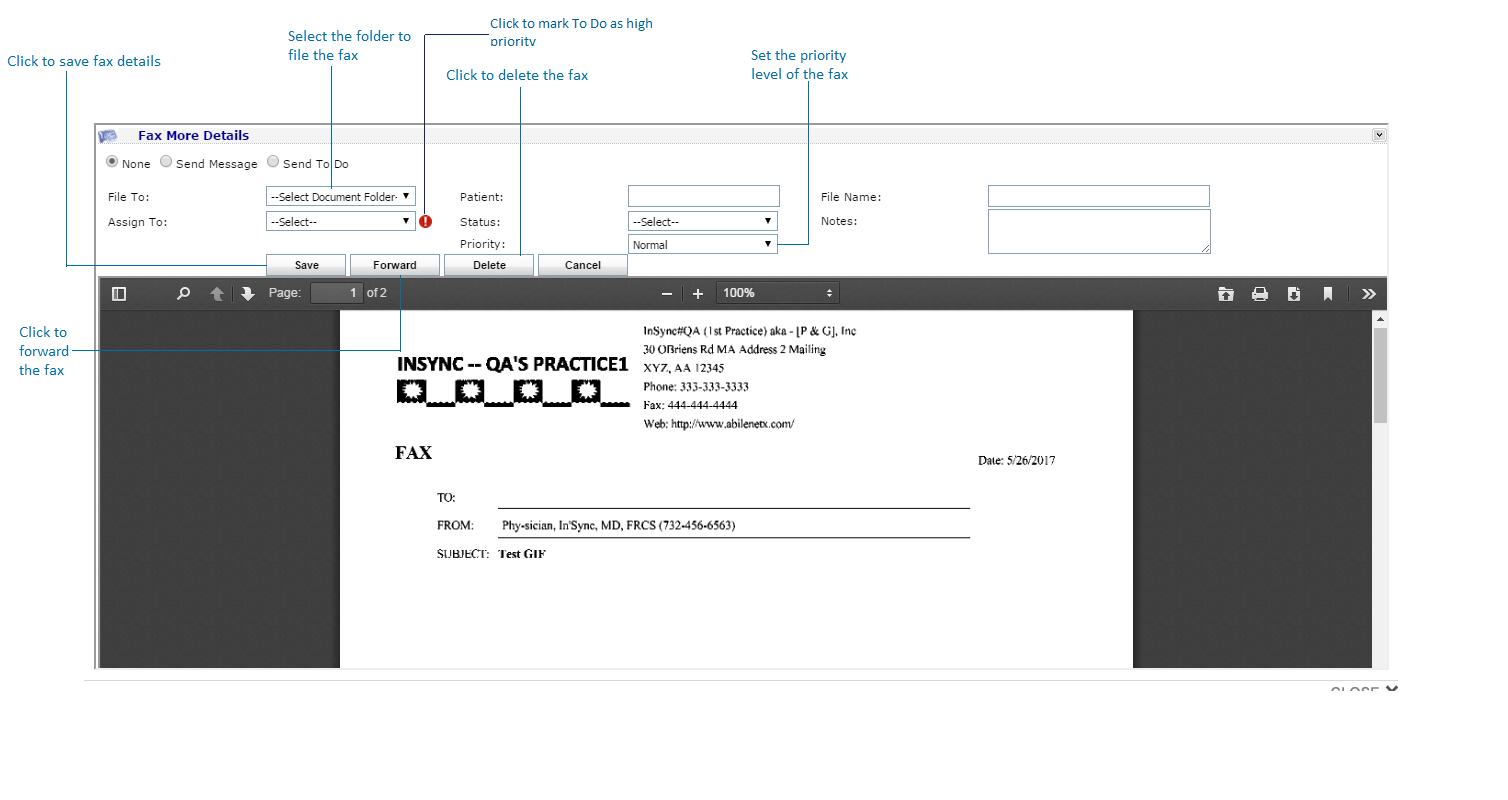
The fax is then opened into the Fax More Details window, where the user can either view or add additional details about the fax. The user is able to make the following selections:
| 1. | Select the document folder where you want to file the fax. |
| 2. | Select the provider to whom you want to Assign the fax. Click this  to assign To Do with high priority. to assign To Do with high priority. |
| 3. | Select the radio button next to the action you want to take with regards to that fax (e.g., None, Send Message, Send To Do). This allows the user to send another user a To Do or Message with the fax attached by clicking in the appropriate radio button. |
Note: If the fax is sent to another user as a To Do or Message, it will appear in the recipient’s To Do or Message box on Dashboard.
| 4. | The Patient the fax is assigned to is pre-populated for the user. |
| 5. | Select the Status of the fax using the drop-down menu. |
| 6. | Select the Priority level of the fax using the drop-down menu. |
| 7. | Change the file name, if desired, by typing in the File Name free-form text box. |
| 8. | Enter any additional Notes about the fax into the free-form text box. |
Note: These details will update upon the user returning to the Inbox tab.
| 10. | Click the Delete button to delete the fax from the Inbox. |
Note: Click “Forward” to forward the fax details. For details on forwarding refer to Forwarding a Fax.

![]() icon indicates that the fax is not read yet. Click the blue link to sort by any of the headings in the Inbox.
icon indicates that the fax is not read yet. Click the blue link to sort by any of the headings in the Inbox. 
