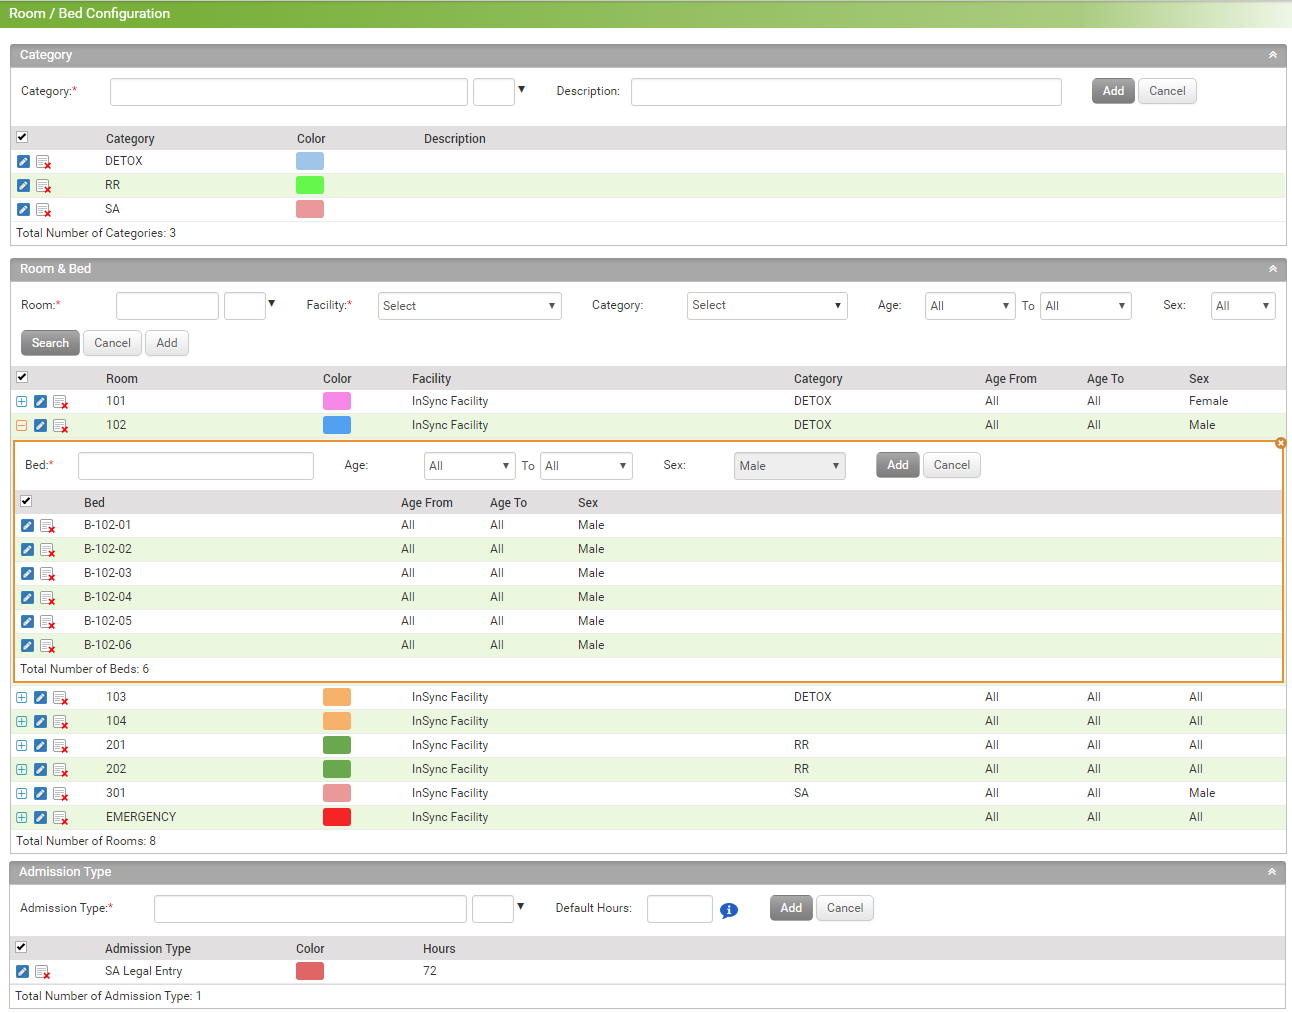
The Room / Bed Configuration module allows practices to configure rooms and beds for inpatient treatment. You can access the configuration screen by clicking the “Administration” tab and selecting “Room / Bed Configuration” option.
Steps to configure Category, Room & Bed, and Admission Type:
On the Room / Bed Configuration screen, you will see 3 panels: Category, Room & Bed, and Admission Type.
Category Tab:
| 1. | Expand the Category panel to add various categories according to the specialty. |
| 2. | Enter the category name in the Category field. |
| 3. | Select appropriate color for that category from the color palette. |
| 4. | Enter short description of the category in the Description field. |
| 5. | Click Add to add that category to the system. |
| 6. | Click the edit icon  to edit that category details. to edit that category details. |
| 7. | Click the inactivate icon  to inactivate that category. to inactivate that category. |
| 8. | Click the activate icon  to activate that category. to activate that category. |
Room & Bed Tab:
| 1. | Expand the Room & Bed panel to add rooms and beds. |
| 2. | Enter the room number in the Room field. |
| 3. | Select the facility from the Facility drop-down. |
| 4. | Select the category from the Category drop-down for which you want to use the room. |
| 5. | Select the age range for which you want to use that room from the Age drop-down. |
| 6. | Select the gender for which you want to utilize the room from the Sex drop-down. |
| 7. | Click Search to find the room based on the search criteria. |
| 8. | Click Add to add the room based on the entered details. |
| 9. | Click the expand icon  to add beds for that room. to add beds for that room. |
Admission Type:
| 1. | Expand the Admission Type tab to add custom admission types. |
| 2. | Enter the admission type in the Admission Type field. |
| 3. | Enter default hours value in the Default Hours field. |
| 4. | Click Add to add that admission type to the system. |